Description
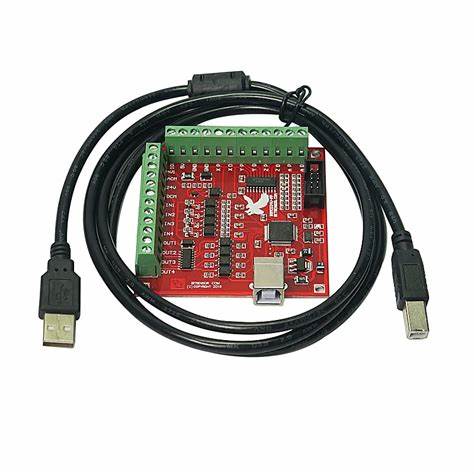
4-Axis 100KHz USB CNC Controller Card for Mach3 lets you use any Windows Computer to be used as CNC Machine Controller. Previously with LPT Port Based Cards, user were limited to use only older computers which had LPT Port.
With this New CNC Control Board you can even run Mach3 on a Windows Tablet which can give more compact and professional look to your CNC Machine.
Technical Specifications
- No of Axis: 4 (you can connect four stepper motor drives or servo drives)
- Maximum step-pulse frequency: 100KHz (suitable for smooth servo or stepper motion)
- Automatic probe tool Support: Yes
- Emergency input: Yes
- Limit switches: Yes (4 general-purpose inputs, you can connect the limit switch, estop switch, probe switch, back to zero and other device)
- Electronic handwheel Support: Yes
- Optical Isolation between USB Side Control and External inputs: Yes
- External Voltage: 12V/24V
- Spindle Control Output: Yes (0-10V output port)
- Isolated Outputs: 4 general-purpose isolated relay drive output interface (can drive four relays for controlling the spindle starts, forward rotating and reverse rotating, pumps and other device)
- Status LED: 1 Status LED (indicate connection status of the controller board)
- Size: 8×7.7cm /3.15×3.03inch
- Tested with following Operating Systems:
- Windows XP (direct)
- Windows 7 64bit /32Bit (direct)
- Windows 10 (Indirect using Windows XP on VmWare)
Setup Instructions
- Step 1: Install Mach3: If you already have a Mach3 Installed, skip this step.
- Step 2: Download the USB Motion Driver RnRMotion.dll from the link down below and copy and paste the file into your Mach3 Plugins folder Example: “C:/Users/ProgramFiles/Mach3/Plugins”
- Step 3: Make sure you board is connected to the PC via USB cable. It should automatically recognize the USB device.
- Step 4: Open Mach3 and you should be prompted to select a driver. Select the “RnRMotionController” and check “Don’t ask me again”. This will allow your board to communicate with Mach3.
- Step 5: Download the XML Mach3 Config File above by right clicking on the link and selecting “save as”. Save the Mach3Mill.xml file in your Mach3 root folder.

